常见技术问题
| FAQ编号 | 21012101 |
|---|---|
| 问题 | How do I achieve the Realtek DASH function and what’s the benefit? |
| 发布日期 | 2021-01-21 |
| 产品 |
All model |
| FAQ类别 | |
| 解答 | Realtek DASH function is able to monitor and control all the client systems by one server system. With Realtek DASH function, it secures out-of-band and remote management of desktops and mobile systems. Products implementing DASH enable interoperable management solutions that allow for low-cost management across networks, offering increased efficiency while maximizing availability.
User could control the client system remotely, it helps IT administrators perform troubleshoot in time, monitor and manage the power status to create the benefit below. • Enables robust, secure management • Reduce the need for desk-side visits • Achieve greater productivity
To achieve above benefit, we introduce the DASH function capability with Management Console Setup utility below. Inventory Purposes: System hardware components identification and OS information Remote Control: Power state settings (on / off / reset / power cycle / Sleep / Hibernate) Software Inventory: BIOS and NIC firmware tracking Event Log: Hardware operation logs Alert Indication: Ability to configure alerts Account & Role Management: Create different account and authority level USB Redirection: USB device and image files redirection over the network Boot device selection: Choose boot device after rebooting Firmware Update: Ability to update NIC firmware over the network
Note: The Management Console Setup utility is only for internal use purpose, if user needs it for testing, please contact with ASRock Industrial TSD contact window. Here is the demonstration video for DASH environment setup : https://youtu.be/jxXbvX_i4TY To support Realtek DASH function, requirements are listed as follows. For client system : a. Onboard DASH LAN port b. Realtek LAN driver. For server system : a. Any PC b. DASH utility (Realtek Management Console).
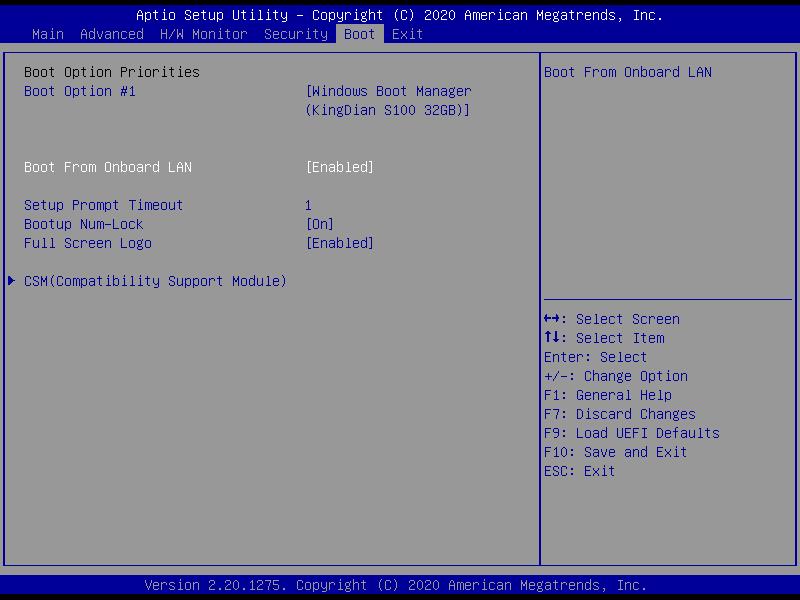
Please follow the steps below to set up the Realtek DASH function. For client system : 1. Enable DASH Support and Boot From Onboard LAN under BIOS.
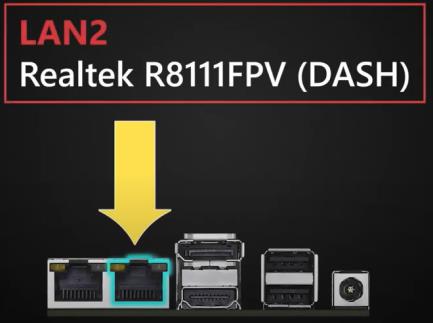
2. Connect the LAN cable to the Internet through the DASH LAN port.
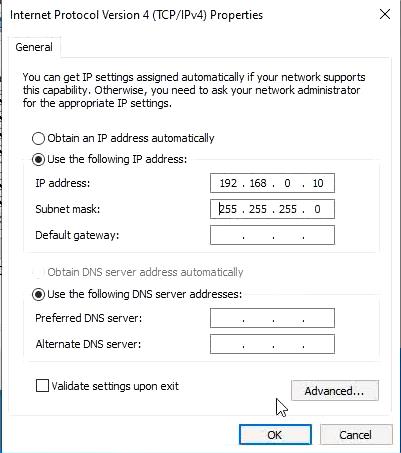
3. Download and install the corresponding Realtek LAN driver from ASRockind website 4. Set the IP address with same domain as server system. Here is the example : Client IP address = 192.168.0.10 Client Subnet mask = 255.255.255.0 Server IP address = 192.168.0.1 Server Subnet mask = 255.255.255.0
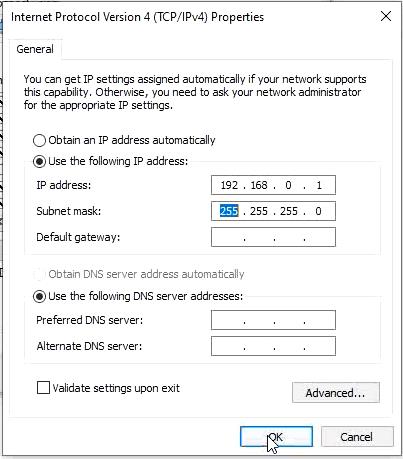
For server system : 1. Install the Realtek Management Console. Note : This utility is only for internal use purpose. If you need it for testing, please contact with ASRock Industrial TSD contact window. 2. Set the IP address with same domain as client system. Here is the example : Client IP address = 192.168.0.10 Client Subnet mask = 255.255.255.0 Server IP address = 192.168.0.1 Server Subnet mask = 255.255.255.0
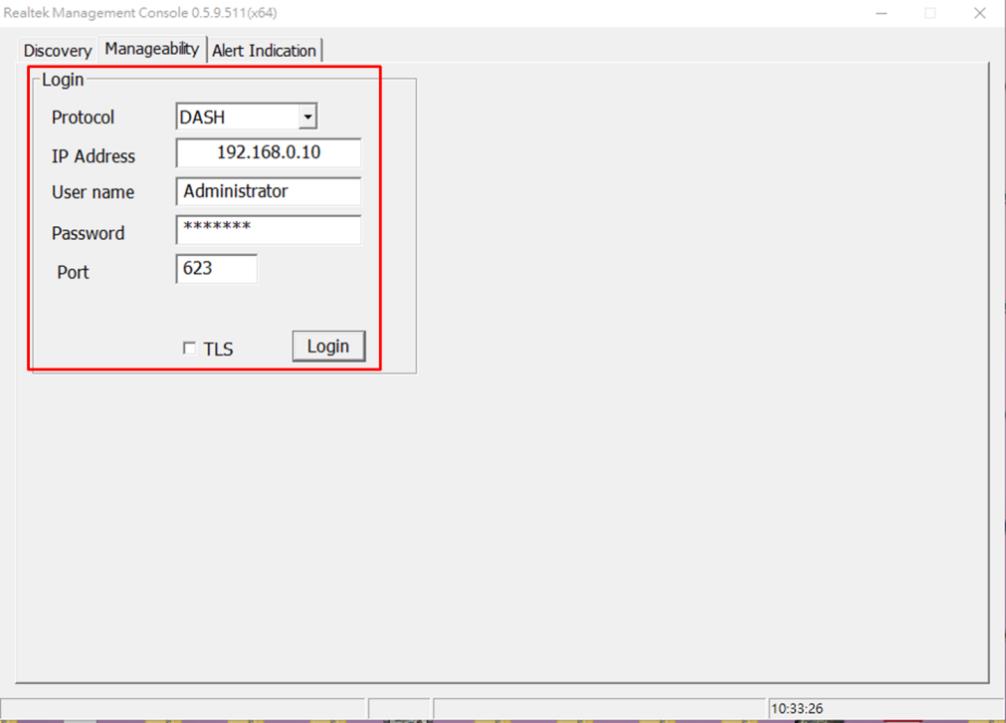
3. Execute the Realtek Management Console, in Manageability page key in the client system IP address, User name and Password to login. IP address : 192.168.0.10 User name : Administrator Password : Realtek
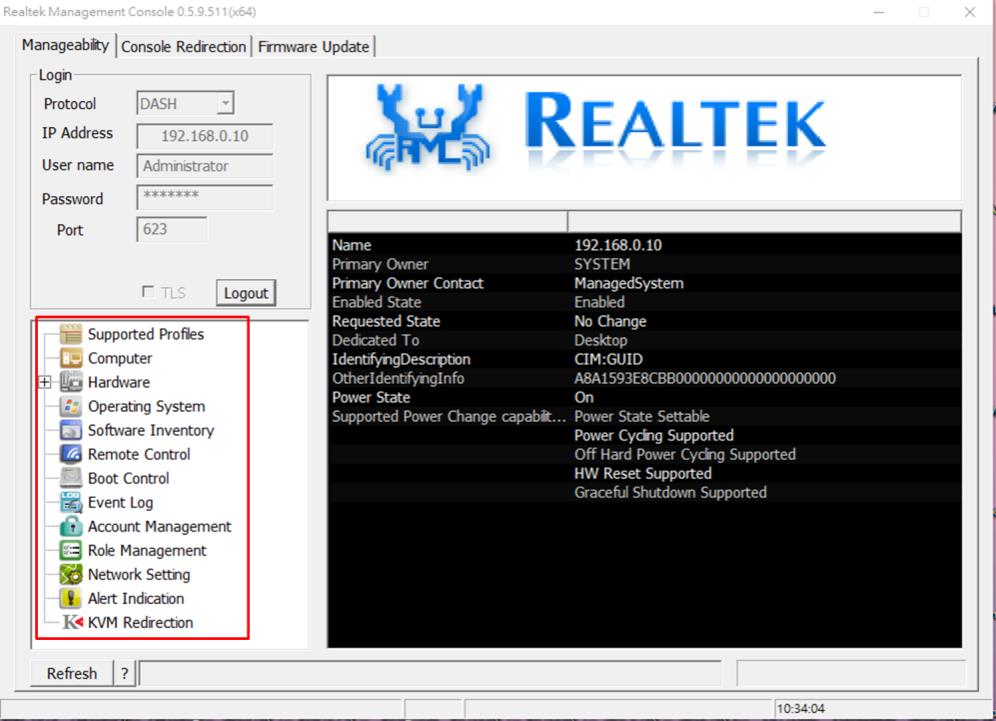
4. User could check the basic information and function at the catalogue, and use the KVM function to control the client system.
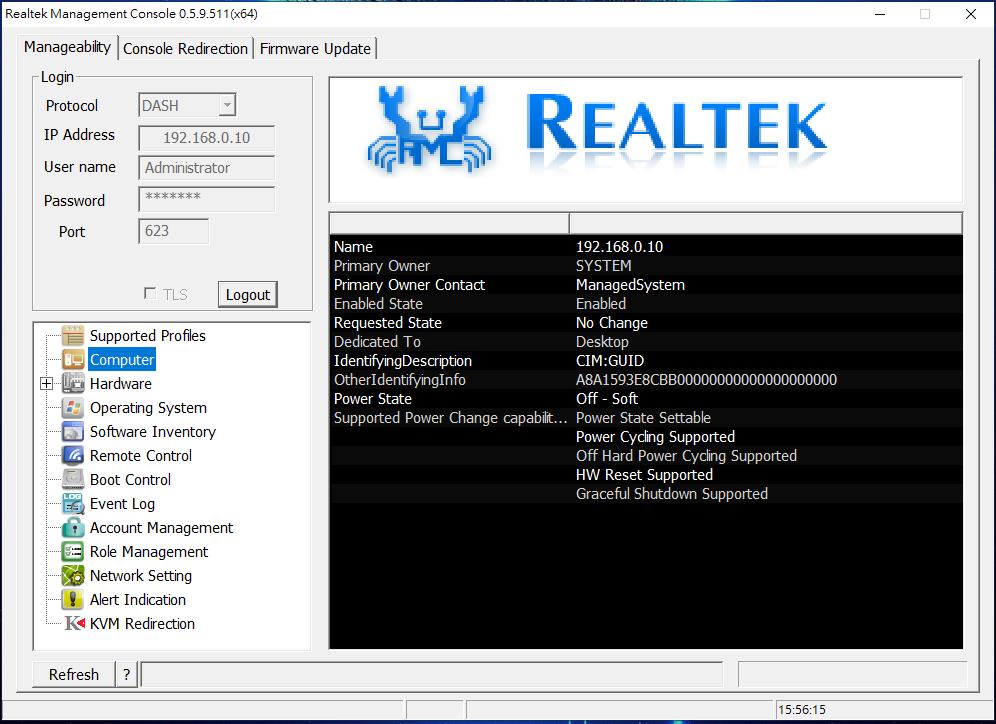
Here is the demonstration for each function of the DASH capability. Inventory Purposes: Please click the items of Computer, Hardware and Operating System as pictured below. 1. Computer :
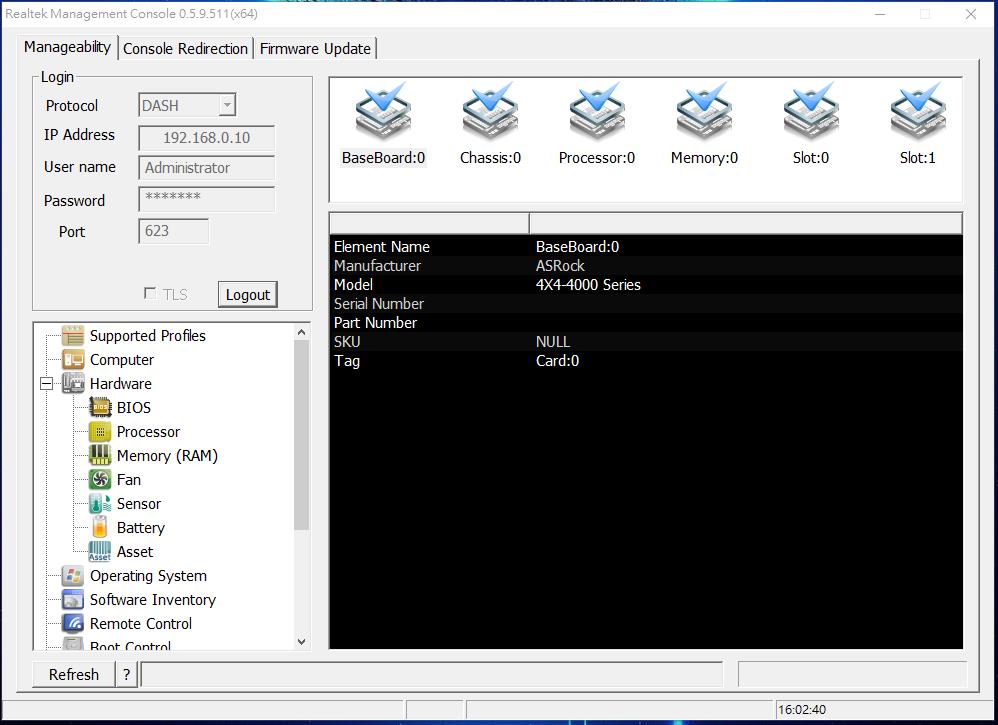
2. Hardware :
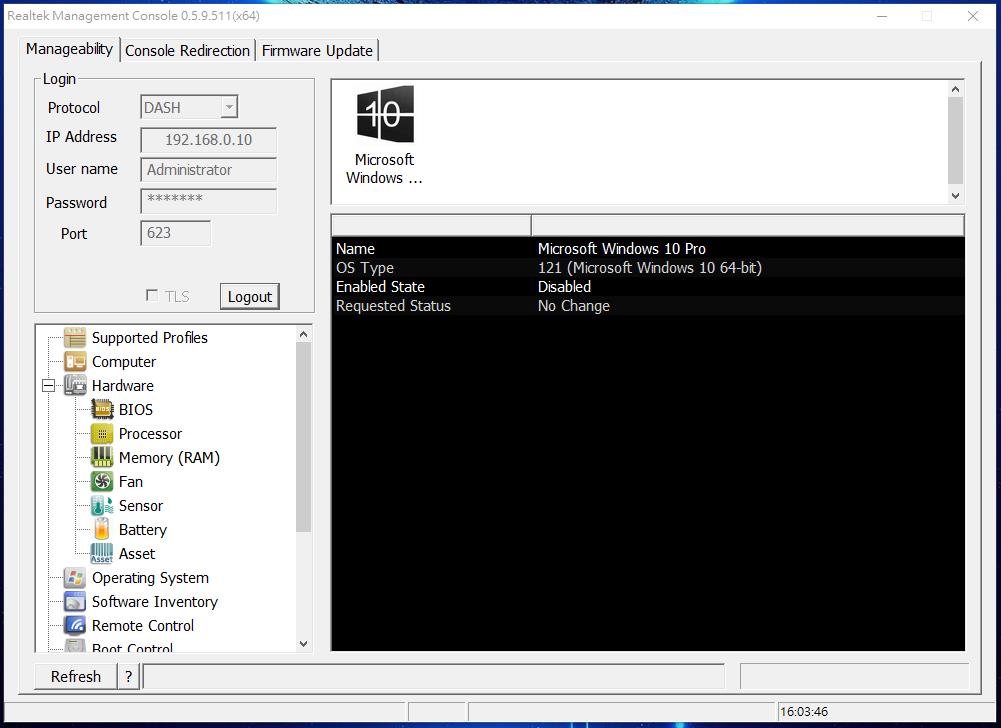
3. Operating System :
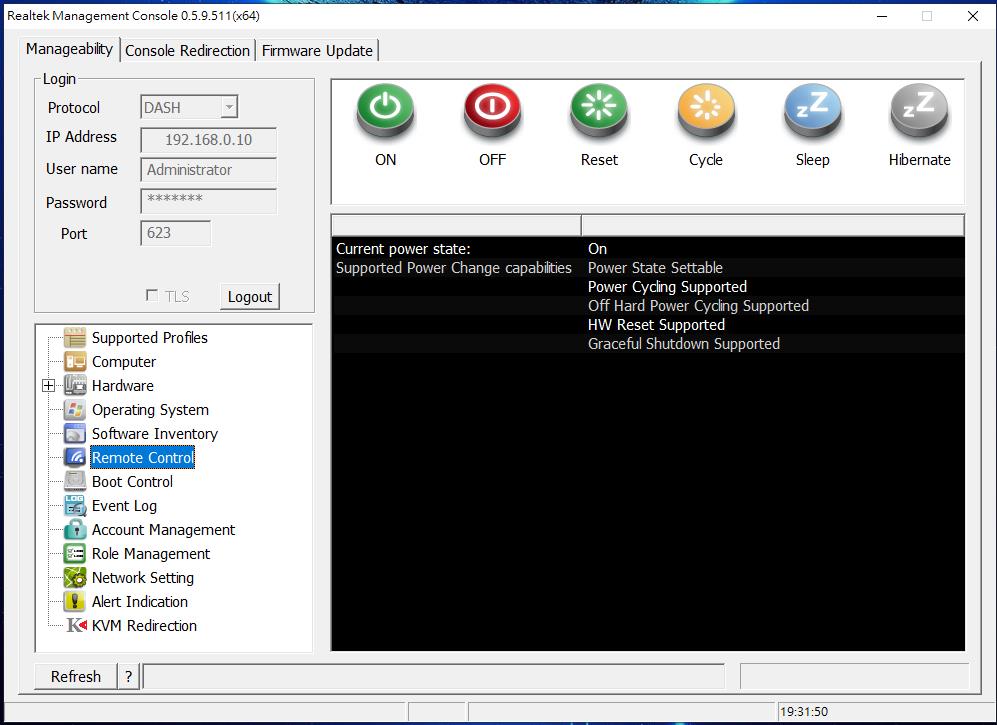
Remote Control: User could click the Remote Control for Power state settings (on / off / reset / power cycle / Sleep / Hibernate).
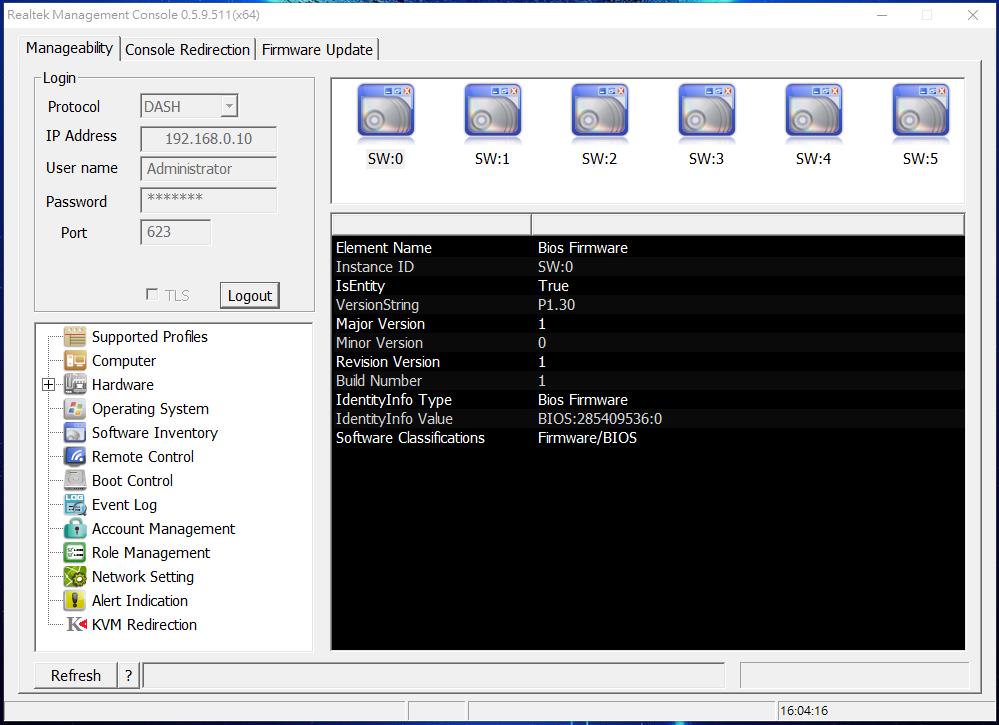
Software Inventory: Track the BIOS and NIC FW after selecting Software Inventory as pictured below.
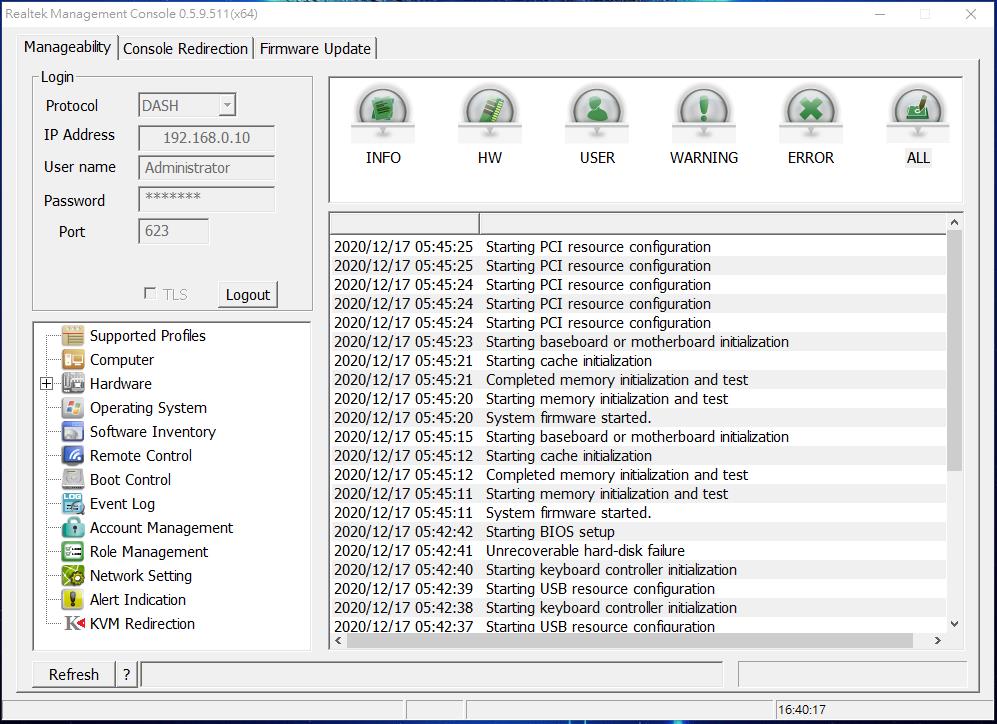
Event Log: Monitor Hardware operation logs by clicking the Event Log.
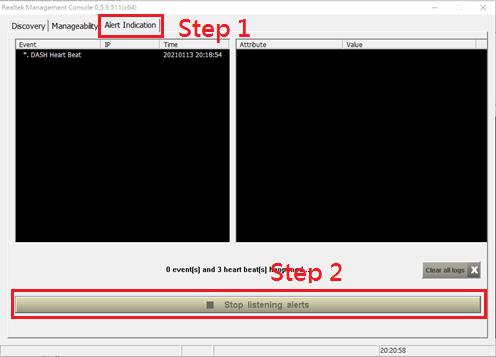
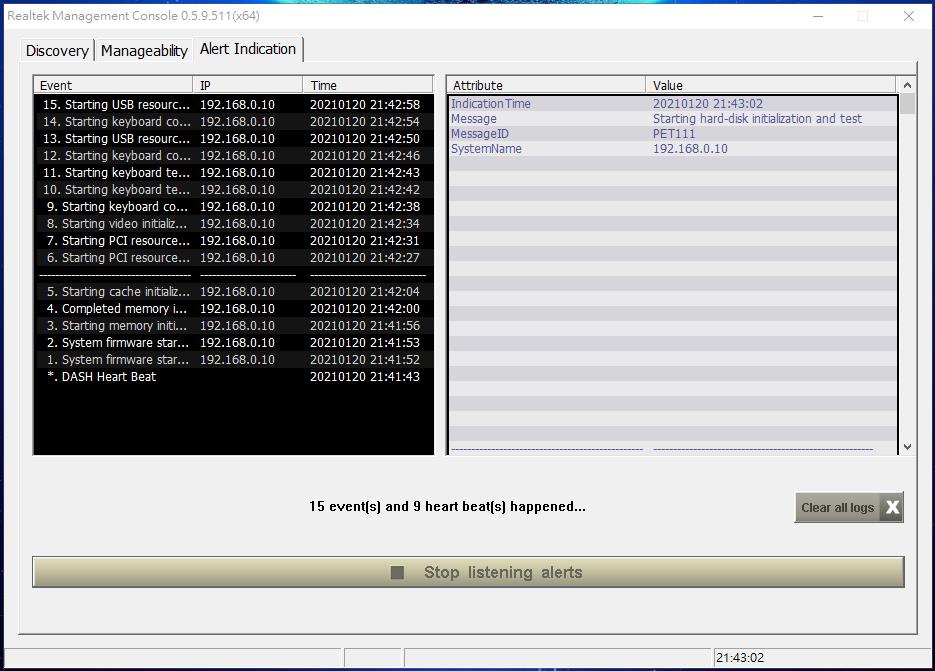
Alert Indication: User could choose the Alert Indication to configure alerts to monitor the client system by event log.
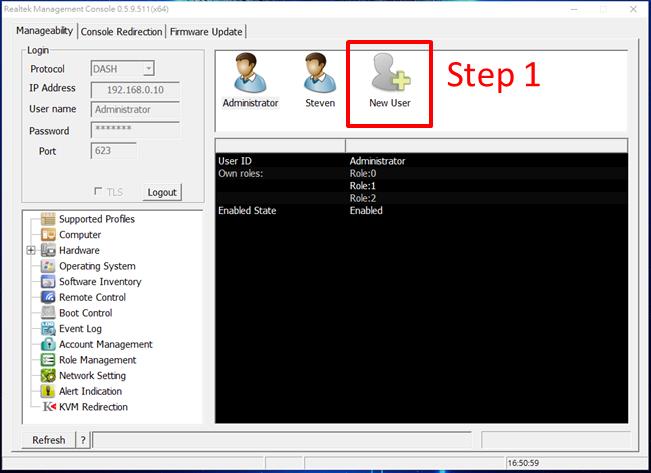
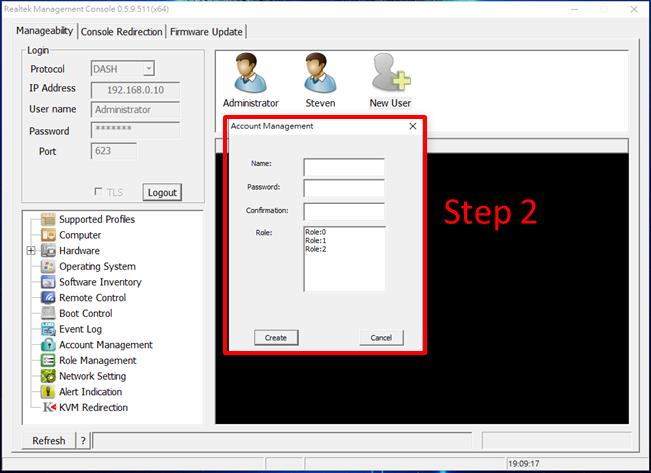
Account & Role Management: By choosing the Account & Role Management, user could create different account and authority level. 1. Account Management: Please refer the step below to create New User. Step 1: Please click the item as pictured below. Step 2: User could choose the Role for authority level.
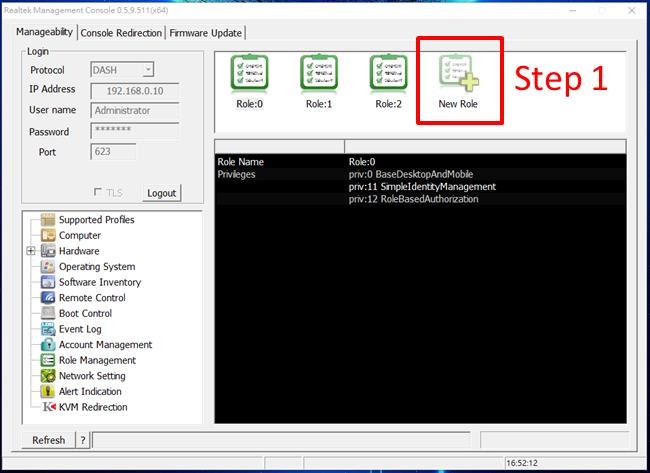
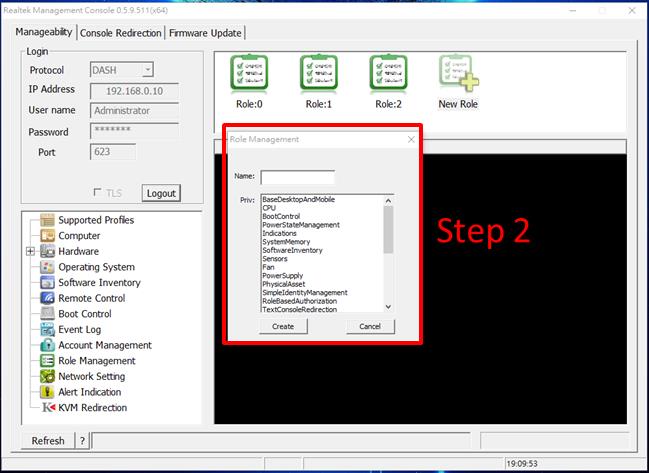
2. Role Management: Please refer the step below to create New Role. Step 1: Please click the item as pictured below. Step 2: User could choose the authority level of the New Role.
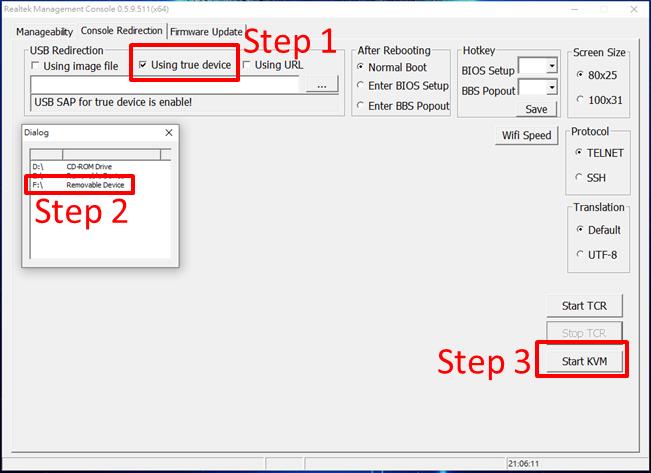
USB Redirection: USB device and image files redirection over the network, user could access the USB device by following the 3 steps below.
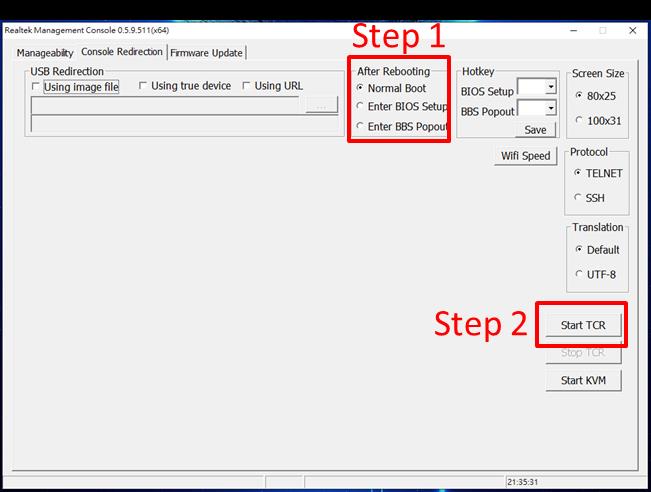
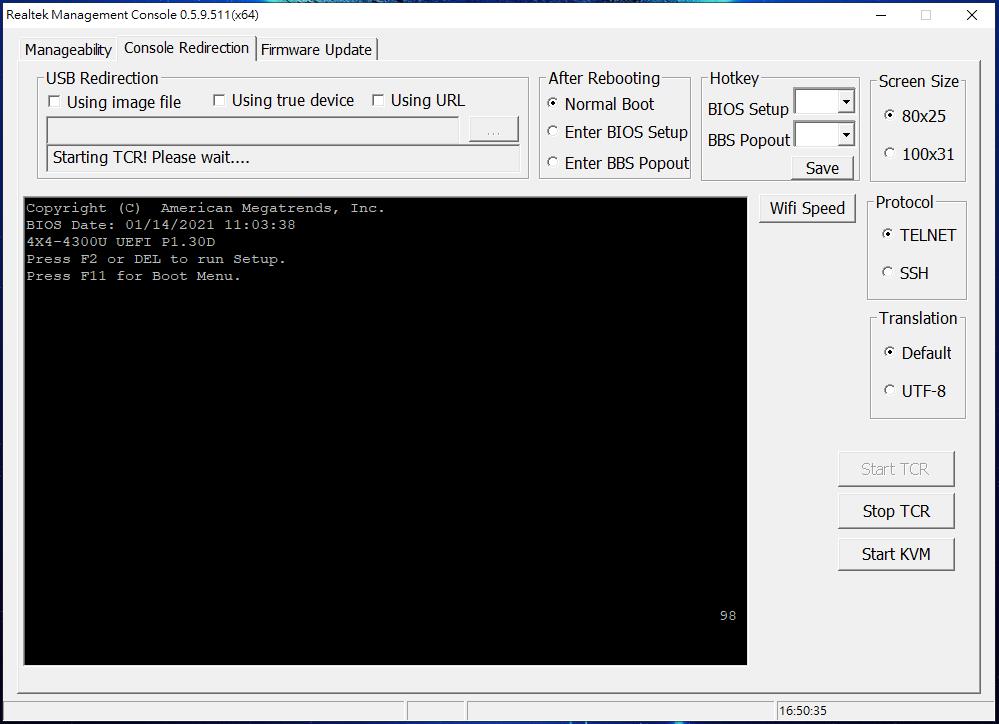
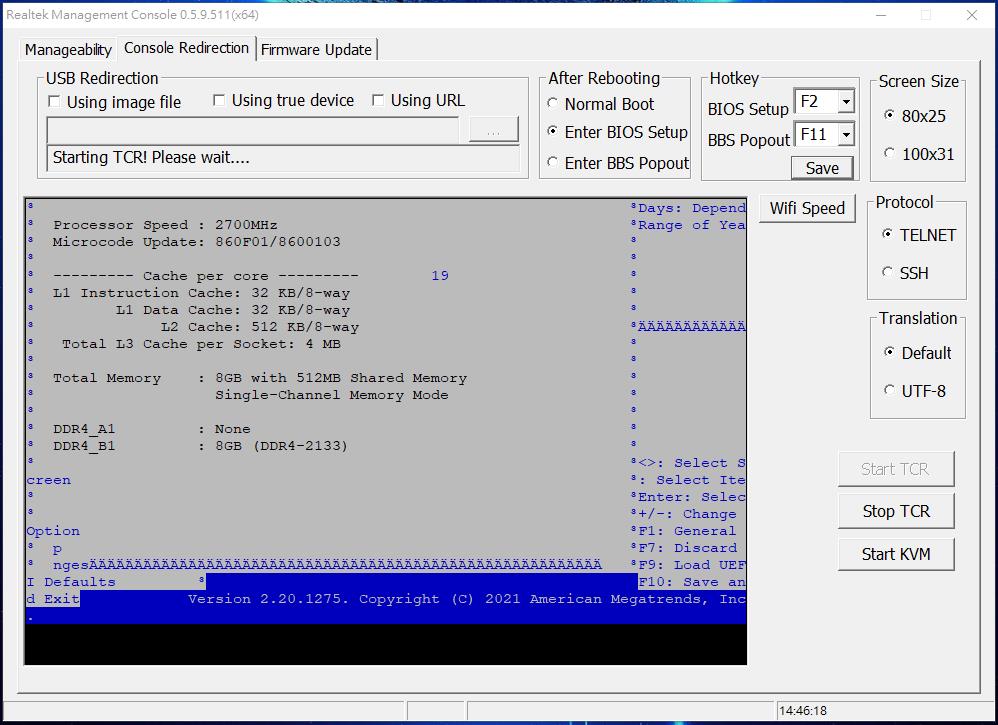
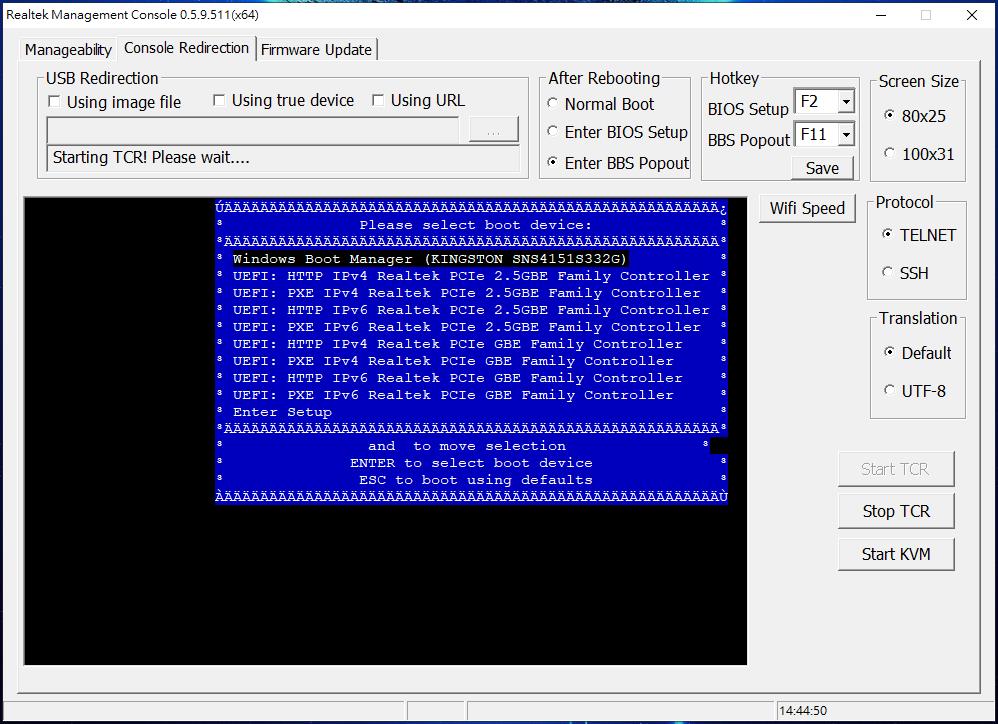
Boot device selection: Select boot device after next system reboot.
1) Normal Boot: The client system will boot into OS after rebooting.
2) Enter BIOS setup: The client system will boot into BIOS setup after rebooting.
3) Enter BBS Popout: The client system will enter boot menu after rebooting.
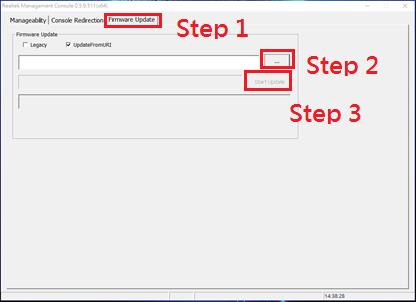
Firmware Update: User could select Firmware Update to update NIC firmware over the network. Step 1: Please click the Firmware Update Step 2: Select the NIC firmware Step 3: Start Update
|